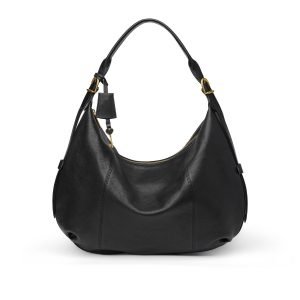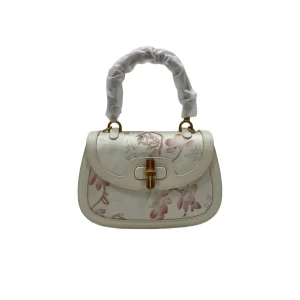
toothbrush embroidery, sometimes described as raised or tufted embroidery.Instead of sitting flat against the surface, the embroidery threads stand upright and form a dense, textured layer.
When viewed from the side or touched by hand, the logo has a noticeably raised profile and a soft, bristle-like surface.
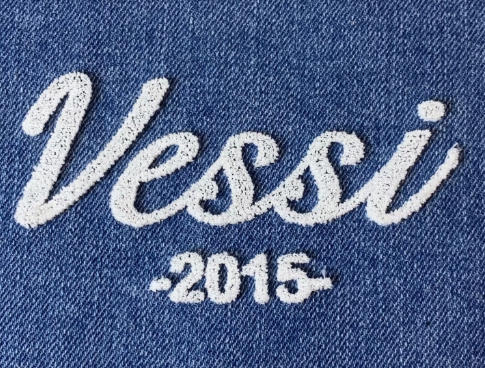
The sample above shows how a raised embroidery structure can give simple lettering much more depth than conventional flat embroidery.
For custom bag development, however, the appearance alone is not enough. Thread height, density, material behavior, logo size, edge definition, and production consistency all need to be tested before the embroidery is used on the finished product.
Why Toothbrush Embroidery Looks Different
The main difference is the structure of the embroidery.
With conventional flat embroidery, most of the thread lies close to the fabric surface. Toothbrush embroidery creates a more pronounced vertical texture, giving lettering and graphic elements a noticeably raised appearance.
This makes the technique particularly suitable for details such as:
- Brand logos
- Lettering and monograms
- Floral motifs
- Graphic elements
- Decorative bag panels
- Fabric patches and accessory components
The final result depends heavily on the material underneath, which is why we normally test the embroidery on the actual or comparable material before confirming bulk production.
Testing Color, Height and Density Before Production
For a custom project, we normally make embroidery test panels before applying a new specification directly to the finished bag.
In this development, different thread colors were tested on the same denim surface so the client could compare the visual contrast and overall raised effect.
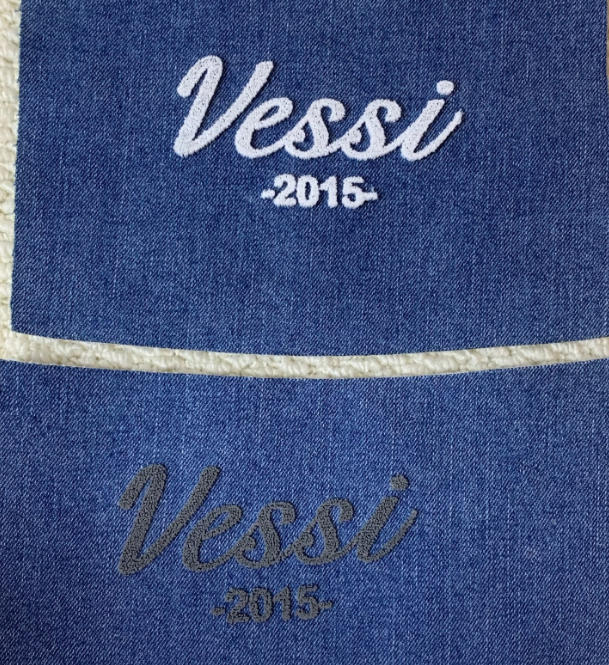
During this stage, we can check:
- Thread height
- Embroidery density
- Logo proportions
- Edge definition
- Thread color
- Surface stability
- Material distortion
Small lettering and narrow design details need particular attention because increasing embroidery height can affect how clearly those details are reproduced.
If the first sample does not achieve the intended result, the embroidery file, stitch density, thread selection, height, or overall logo size can be adjusted before the process moves into production.
The Difficult Part Is Controlling the Detail
Toothbrush embroidery may look straightforward once the sample is finished, but several variables need to work together.
Stitch Density
Stitch density needs to be high enough to create a full and consistent raised surface without making the embroidered area unnecessarily stiff.
Thread Tension
Thread tension also needs careful adjustment. If the tension is too loose, the raised structure may lose definition. If it is too tight, the embroidery can distort the base material or affect the shape of the lettering.
Base Material
Different materials behave differently under embroidery.
Denim, canvas, synthetic fabrics, leather-compatible panels, and other bag materials may require different combinations of needle, thread, stabilizer, embroidery density, and machine settings.
This is why material testing is part of the development process rather than something we leave until bulk production.
Multi-Head Embroidery for Custom Bag Production
Once the embroidery artwork, material, thread, and machine settings have been approved, the project can move from development into repeat production.
Our embroidery workshop is equipped with multi-head embroidery machines that allow multiple components to be processed simultaneously.
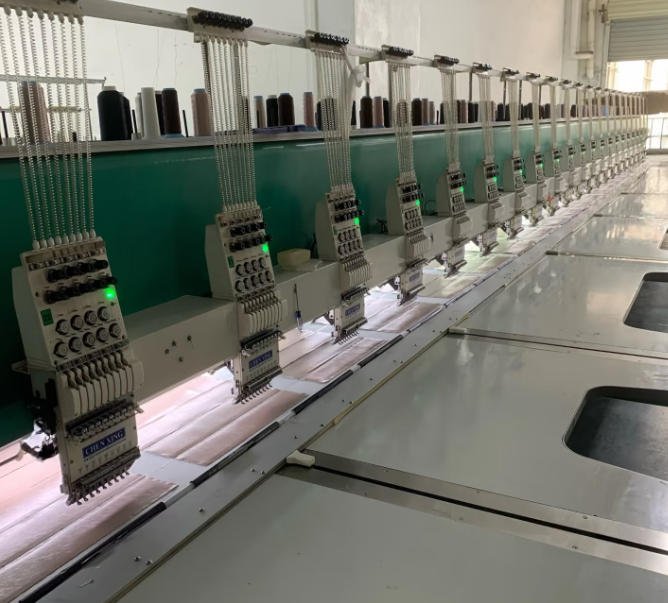
For B2B bag production, machine capacity is only one part of the process.
What matters is whether the approved embroidery result can be reproduced consistently across the complete batch.
Before bulk embroidery begins, we check the artwork, thread selection, material, placement, embroidery density, and machine settings against the approved sample.
From One Approved Sample to Repeat Production
Multi-head production allows the same embroidery program to be applied to multiple prepared panels at the same time.
This is particularly useful when a bag design includes repeated embroidered logos, front panels, pocket panels, patches, or decorative components.
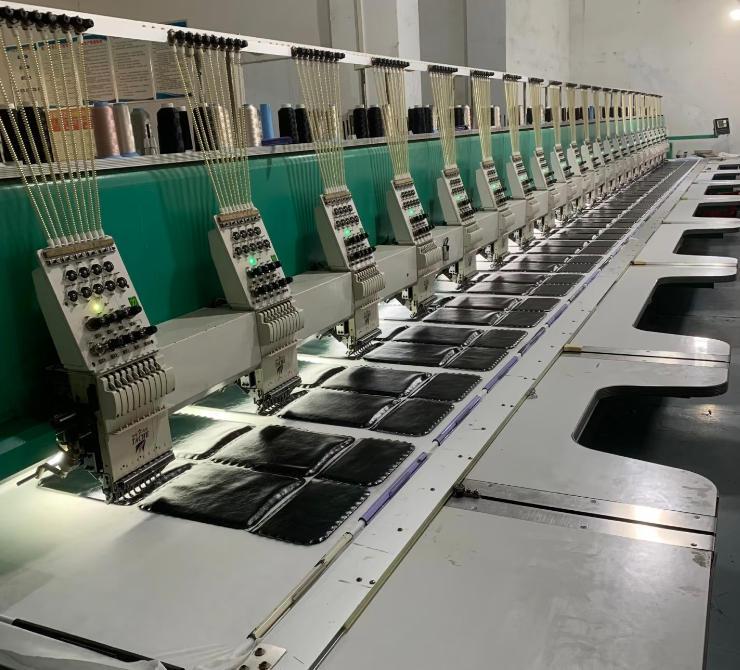
During production, consistency needs to be maintained across every piece rather than judging only the first approved sample.
Placement, thread tension, design dimensions, density, and the condition of the base material all need to remain controlled throughout the run.
Embroidery Is Part of the Bag Construction
When embroidery is being developed for a handbag, backpack, tote, or accessory, we do not treat it as an isolated decorative process.
The embroidery can affect the construction of the panel itself.
Depending on the design, our development team may need to consider:
- Panel thickness after embroidery
- Backing or stabilizer requirements
- Seam allowance around the embroidered area
- Whether the panel will later be folded
- Whether stitching lines pass close to the embroidery
- Logo placement relative to pockets and zippers
- Hardware positioning
- Material stretch or distortion
- Final logo size and positioning
These details are much easier to correct during sampling than after the bag has already been assembled.
Specialty Embroidery for Different Bag Panels
The same embroidery workshop can also be used for different decorative constructions depending on the design and base material.
Some projects require raised logos, while others may use quilted embroidery, dimensional stitching, decorative patterns, or other specialty embroidery techniques.
The embroidery technique should therefore be selected according to the product design rather than simply choosing the most visually complicated process.
Material compatibility, production repeatability, bag construction, and the final appearance all need to be considered together.
From Embroidery Artwork to Finished Bag
A typical embroidery development process for a custom bag project follows this sequence:
Artwork Review → Material Test → Embroidery Sample → Client Approval → Bag Prototype → Production Setting → Bulk Embroidery → Bag Assembly
If the embroidery sample does not produce the intended result, we can make adjustments before it becomes part of the finished bag.
That may include changing embroidery density, thread selection, thread height, artwork proportions, backing material, or machine settings.
A small test at the beginning of the project can prevent much larger problems later in production.
After years of working with custom bag development and manufacturing, we have found that embroidery details often have a greater impact on the finished product than they appear to have on a tech pack.
A good embroidery result does not come from the machine alone. It comes from getting the
material, digitized artwork, thread, machine settings, embroidery structure, and bag construction
to work together.